CNC Prototyper 2017 Update, Part 4
Enclosures.
As you can see from my last update with the four Youtube videos, dust, airborne particulates, and flying debris all emanate in large quantities from a CNC router.
I wanted to contain this without breaking the bank.
Here we go...


 A few sticks of 3/4" Schedule 40 PVC pipe from Home Depot, 8 T joints, 8 90 degree elbows.
Step one, remove CNC prototyper from target area.
 Cut four 5-inch lengths, and four 3-inch lengths. Shorties go on bottom, big ones up top. That PVC cutter is a very handy tool, and I advise you purchase one for PVC jobs.
 Cut your cross members to length, and form the base. Mine looks funky because I have to accommodate the sled base of the prototyper.
 Add your vertical risers, all the same length.
 Add the longer top corners, along with their cross members. The frame is now complete.


 I initially only bought two set of shower curtains and rings, thinking it would be enough for the side walls. I was wrong. I tried to improvise, and use a canvas drop cloth.
Too ugly. Maybe I'm fussy, but it just looked too hokey, even for me.
 So, I took it all apart, went back to Walmart, and bought two more shower curtains and sets of rings.
 "Always practice Safe CNC, kids." ;)


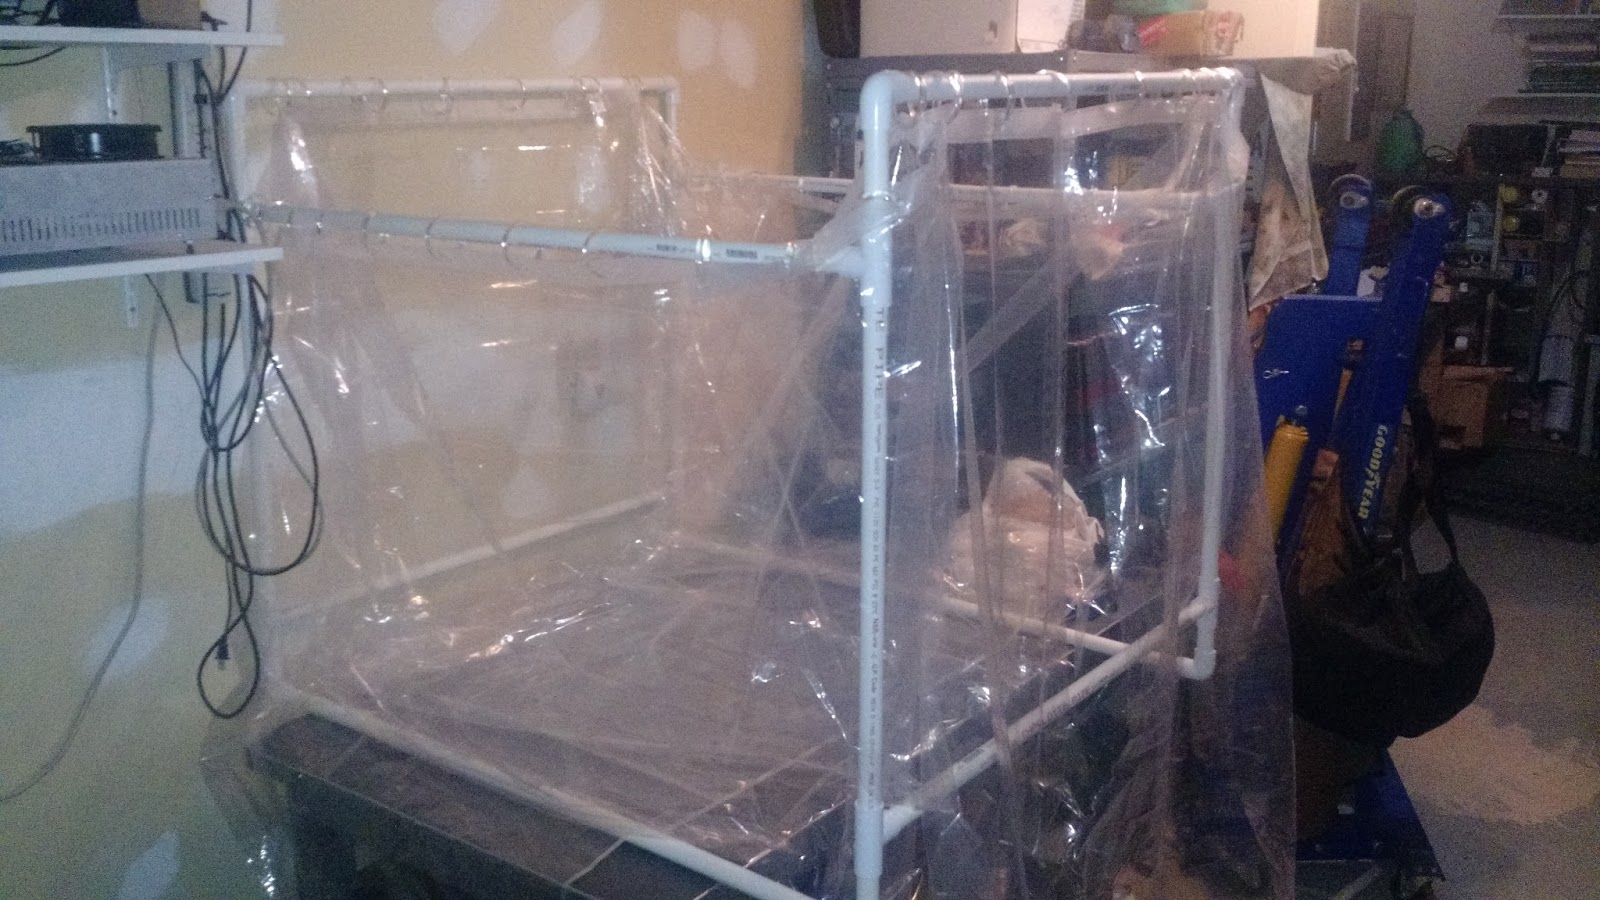
 Sled and main prototyper assembly are placed in their new enclosure.


Everything's wired up and ready to go. Seams are taped with packing tape, and hopefully the dust and chips will be contained.
So, all told, I spent about $40 USD. Four sticks of PVC pipe, 8 T's, 8 90's, 4 shower curtains (the $2 cheapies), and 4 sets of rings (.50 cents a set). Not too bad.
Enjoy!
Best,
JBR
As you can see from my last update with the four Youtube videos, dust, airborne particulates, and flying debris all emanate in large quantities from a CNC router.
I wanted to contain this without breaking the bank.
Here we go...


Step one, remove CNC prototyper from target area.


Too ugly. Maybe I'm fussy, but it just looked too hokey, even for me.


Everything's wired up and ready to go. Seams are taped with packing tape, and hopefully the dust and chips will be contained.
So, all told, I spent about $40 USD. Four sticks of PVC pipe, 8 T's, 8 90's, 4 shower curtains (the $2 cheapies), and 4 sets of rings (.50 cents a set). Not too bad.
Enjoy!
Best,
JBR


Comments